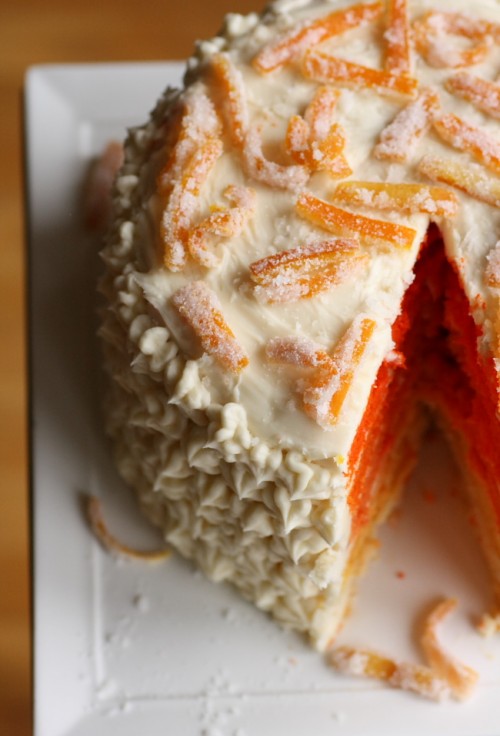

Orange is not my favorite color. Not by a long shot. Unfortunately, I now have no choice but to embrace it—as my company’s new branding revolves around a wildly intense shade of it. My vehement protest against the change was to no avail, so I’ve adopted the if-you-can’t-beat-’em-join-’em mentality. A turning point in this acceptance came after baking this little beauty for the agency rebranding celebration:

Not only did it turn out beautifully, but I won the party’s orange food contest (a small consolation for having to stare at the orange, agency-branded coffee mugs, drinking glasses and other tchotchkes that have recently infiltrated my workplace). This post isn’t a recipe, so much as a collection of tips on making ombre cakes. Just use your favorite white cake and frosting recipe (I’m partial to a simple buttercream) and choose a color, then follow these tips.
- Add some flavor. Since my cake was orange, I substituted half of the liquid in the cake batter recipe for triple sec. Depending on the flavor you want, you can add flavored liquor like I did, or extracts, herbs (lavender, for example, would be divine for a purple ombre cake with lemon flavored icing), zests, etc.
- Add some color. For ombre cakes, I highly recommend powdered food coloring. Not only would you need a ton of liquid coloring to get the deeper, more saturated shades, but it could throw off the consistency of the batter because you’d have to add a fair amount of extra liquid.

- Flour and grease the pans like there’s no tomorrow. ‘Nuff said.
- Little by little … Make enough batter for five or six thin layers (I used 8-inch round pans, filled about halfway with batter). Then slowly start to add the food coloring until you get the lightest shade you want. Pour a little of the batter into the first pan. Continue to add food coloring to the big batch of batter until you get the second lightest shade. Pour a little more of the batter into the second pan. Continue this process, gradually darkening the batter with more food coloring for each pan.
- Take a little off the top. If you’ve never made a layer cake before, you might not know that you need to shave off the top of each layer, which rises unevenly in the oven, to create a flat surface upon which to set the next layer. A sharp chef’s knife should do the trick. Wait until the layers have completely cooled to do this—you may even want to chill them if you have time.
- Don’t fret the frosting. In my opinion, frosting a cake without making a total mess of it is the hardest part. I’m no expert by any means, so take my advice on this topic with a grain of salt: I heated the frosting a bit and put it into a piping bag; then I squirted the soft frosting onto each layer and *gently* spread it with a knife. The outside of the cake was much trickier, so I ended up using a fancy tip and piping little flowers to cover up my messy frosting job.
- Dark on the top, light on the bottom. Personal preference I guess, but I just think it looks better.
- Have fun with the embellishments. To go with my orange theme, I sprinkled homemade candied orange peels on the top of the cake. This definitely took it up a notch.

Ombre away! And in the meantime, here’s a little more orange to help this post live up to its title:


10 Comments
Amy C
This is beautiful, and orange is one of my favorite colors. I recently made a rainbow cake, and I’ve been curious to try an ombre cake, so this was the inspiration I needed. I especially like the candied orange peels. Thanks!
Pingback:
Stef Arochi
This is freaking amazing! Your tips are so easy to follow and the result looks fantastic! Think i’ll try making it this 3 day weekend! 🙂
Stef
grace
this is fantastic! i’ve seen lots of ombre cakes lately, but this one is done with such impressive precision! orange isn’t my favorite color either, but you’ve managed to make me love it. 🙂
Rima
this is awesome. not a fan of orange color but this looks pretty neat!
Pingback:
Sarah
Personally, I LOVE orange. This is gorgeous.
Pingback:
Pingback:
Pingback: