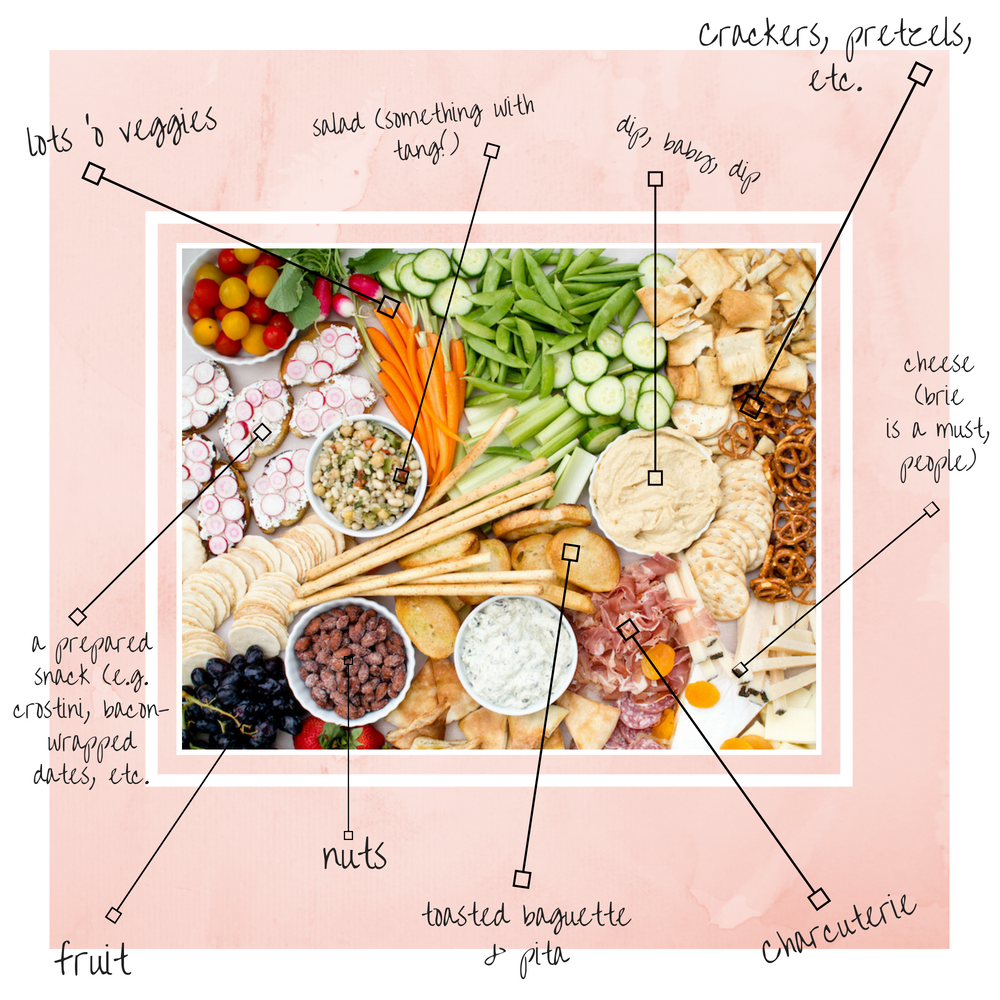
“Seriously?” he said. One look at my grazing table and my husband’s too-much-money-spent-on-food radar went bananas. But for such an impressive and massive spread, it’s a deceptively cost-effective way to feed a crowd. It just looks expen$ive … which is sorta the point. It’s loaded with veggies (cheap), various carbs (cheap), dips/hummus (pretty cheap), and the pièce de résistance: fancy cheese and charcuterie (not cheap, but worth it). I made one of these for a party a couple weekends ago and now I CAN’T STOP making and thinking about them, mostly because they save me from myself. Old me would plan for WAY too many apps and snacks, buy hundreds of…
-
-
Warming up with Ramen
Any Chicagoan knows—spring here is MADDENING. Just last week, a beautiful 70-degree day turned freezing in a matter of hours. Good thing we have ramen for the April and May nights where BBQ weather turns blustery. I rarely cook Asian food—my inexperience with the flavors and techniques has always been intimidating. Regardless, I studied up, experiemented, sampled my broth as I built the flavors, and ended up with a recipe that got two enthusiastic thumbs up from my taste tester. 5 from 1 vote Print Easy chicken ramen Thanks to a little help from my local grocer, Ramen becomes an easy weeknight meal. Course Main Course, Soup Cuisine Japanese Prep Time…
-
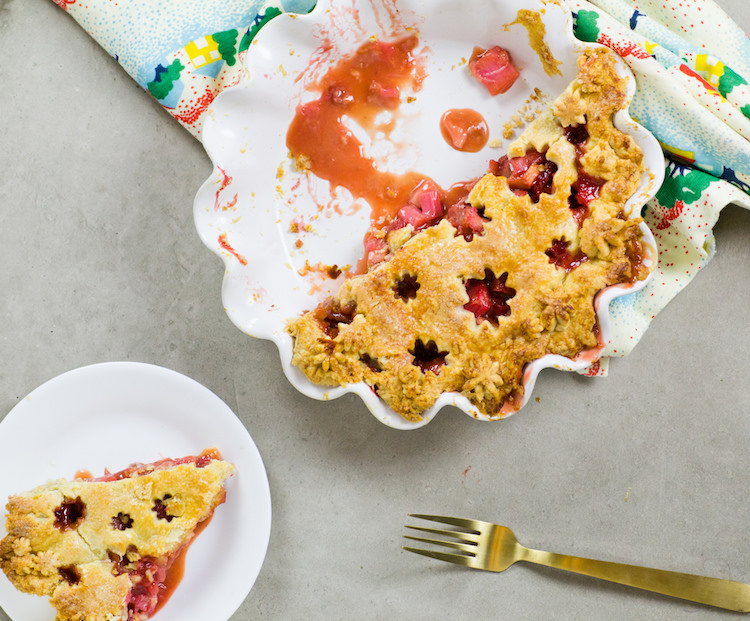
Fake it till you bake it
When it comes to pie crust, I’m the first to reach for that trusty store-bought Pillsbury. But when Bon Appetit tells you to go homemade, and to put vodka in the dough, you listen. You listen hard. And then you get the most impossibly tender, flaky, perfect pie crust of your LIFE. In addition to the recipe itself, I’m giving you a few additional directives … Tips for a perfect homemade pie crust: Vodka is necessary because, well, SCIENCE. The liquid helps keep the dough pliable and workable without over-developing the gluten. It cooks off in the oven, leaving a flaky, layered crust. Cut the butter into small pieces, about…
-
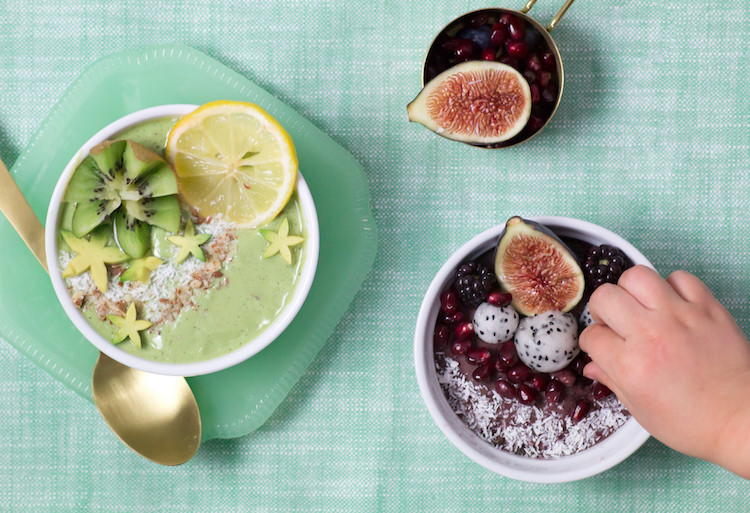
Smoothie bowls FTW
My return to blogging has drawn me back down the rabbit hole that is Pinterest. And speaking of platforms that encourage hours of mindless scrolling, I must tell you: You haven’t lived until you’ve seen all 36,264 #grazingtable posts on Instagram. Srrrrsllly tho. Anyway, the point is, it’s been a long and intense search for inspiration to fuel my dive back into recipe creation, food styling and photography. So imagine my delight when I stumbled upon AlphaFoodie’s breathtaking smoothie bowls. I did not know this was a thing, but I’m fairly certain it’s part of the #grazingtable / #avocadotoast / #ramen conspiracy designed to keep us all wide-eyed and drooling…
-
Hello, it’s me …
I was wondering if after all these years you’d like read … And go over everything … They said I’m supposed to blog … But I ain’t done much bloooooggggging. Better With Butter has been in existence for almost a DECADE, ya’ll. But after a brief (*cough* 4 years *cough, cough*) hiatus, I’m realizing that a lot has changed in the food blogging world. In fact, the term itself is revealing my lack of with-it-ness. “Influencer” is now the preferred nomenclature thanks to that new-fangled insta-whatever that all the kids are using. Unfortunately, the only thing I’ve influenced in the past 4 years, food-wise, are the snack choices of a…
-
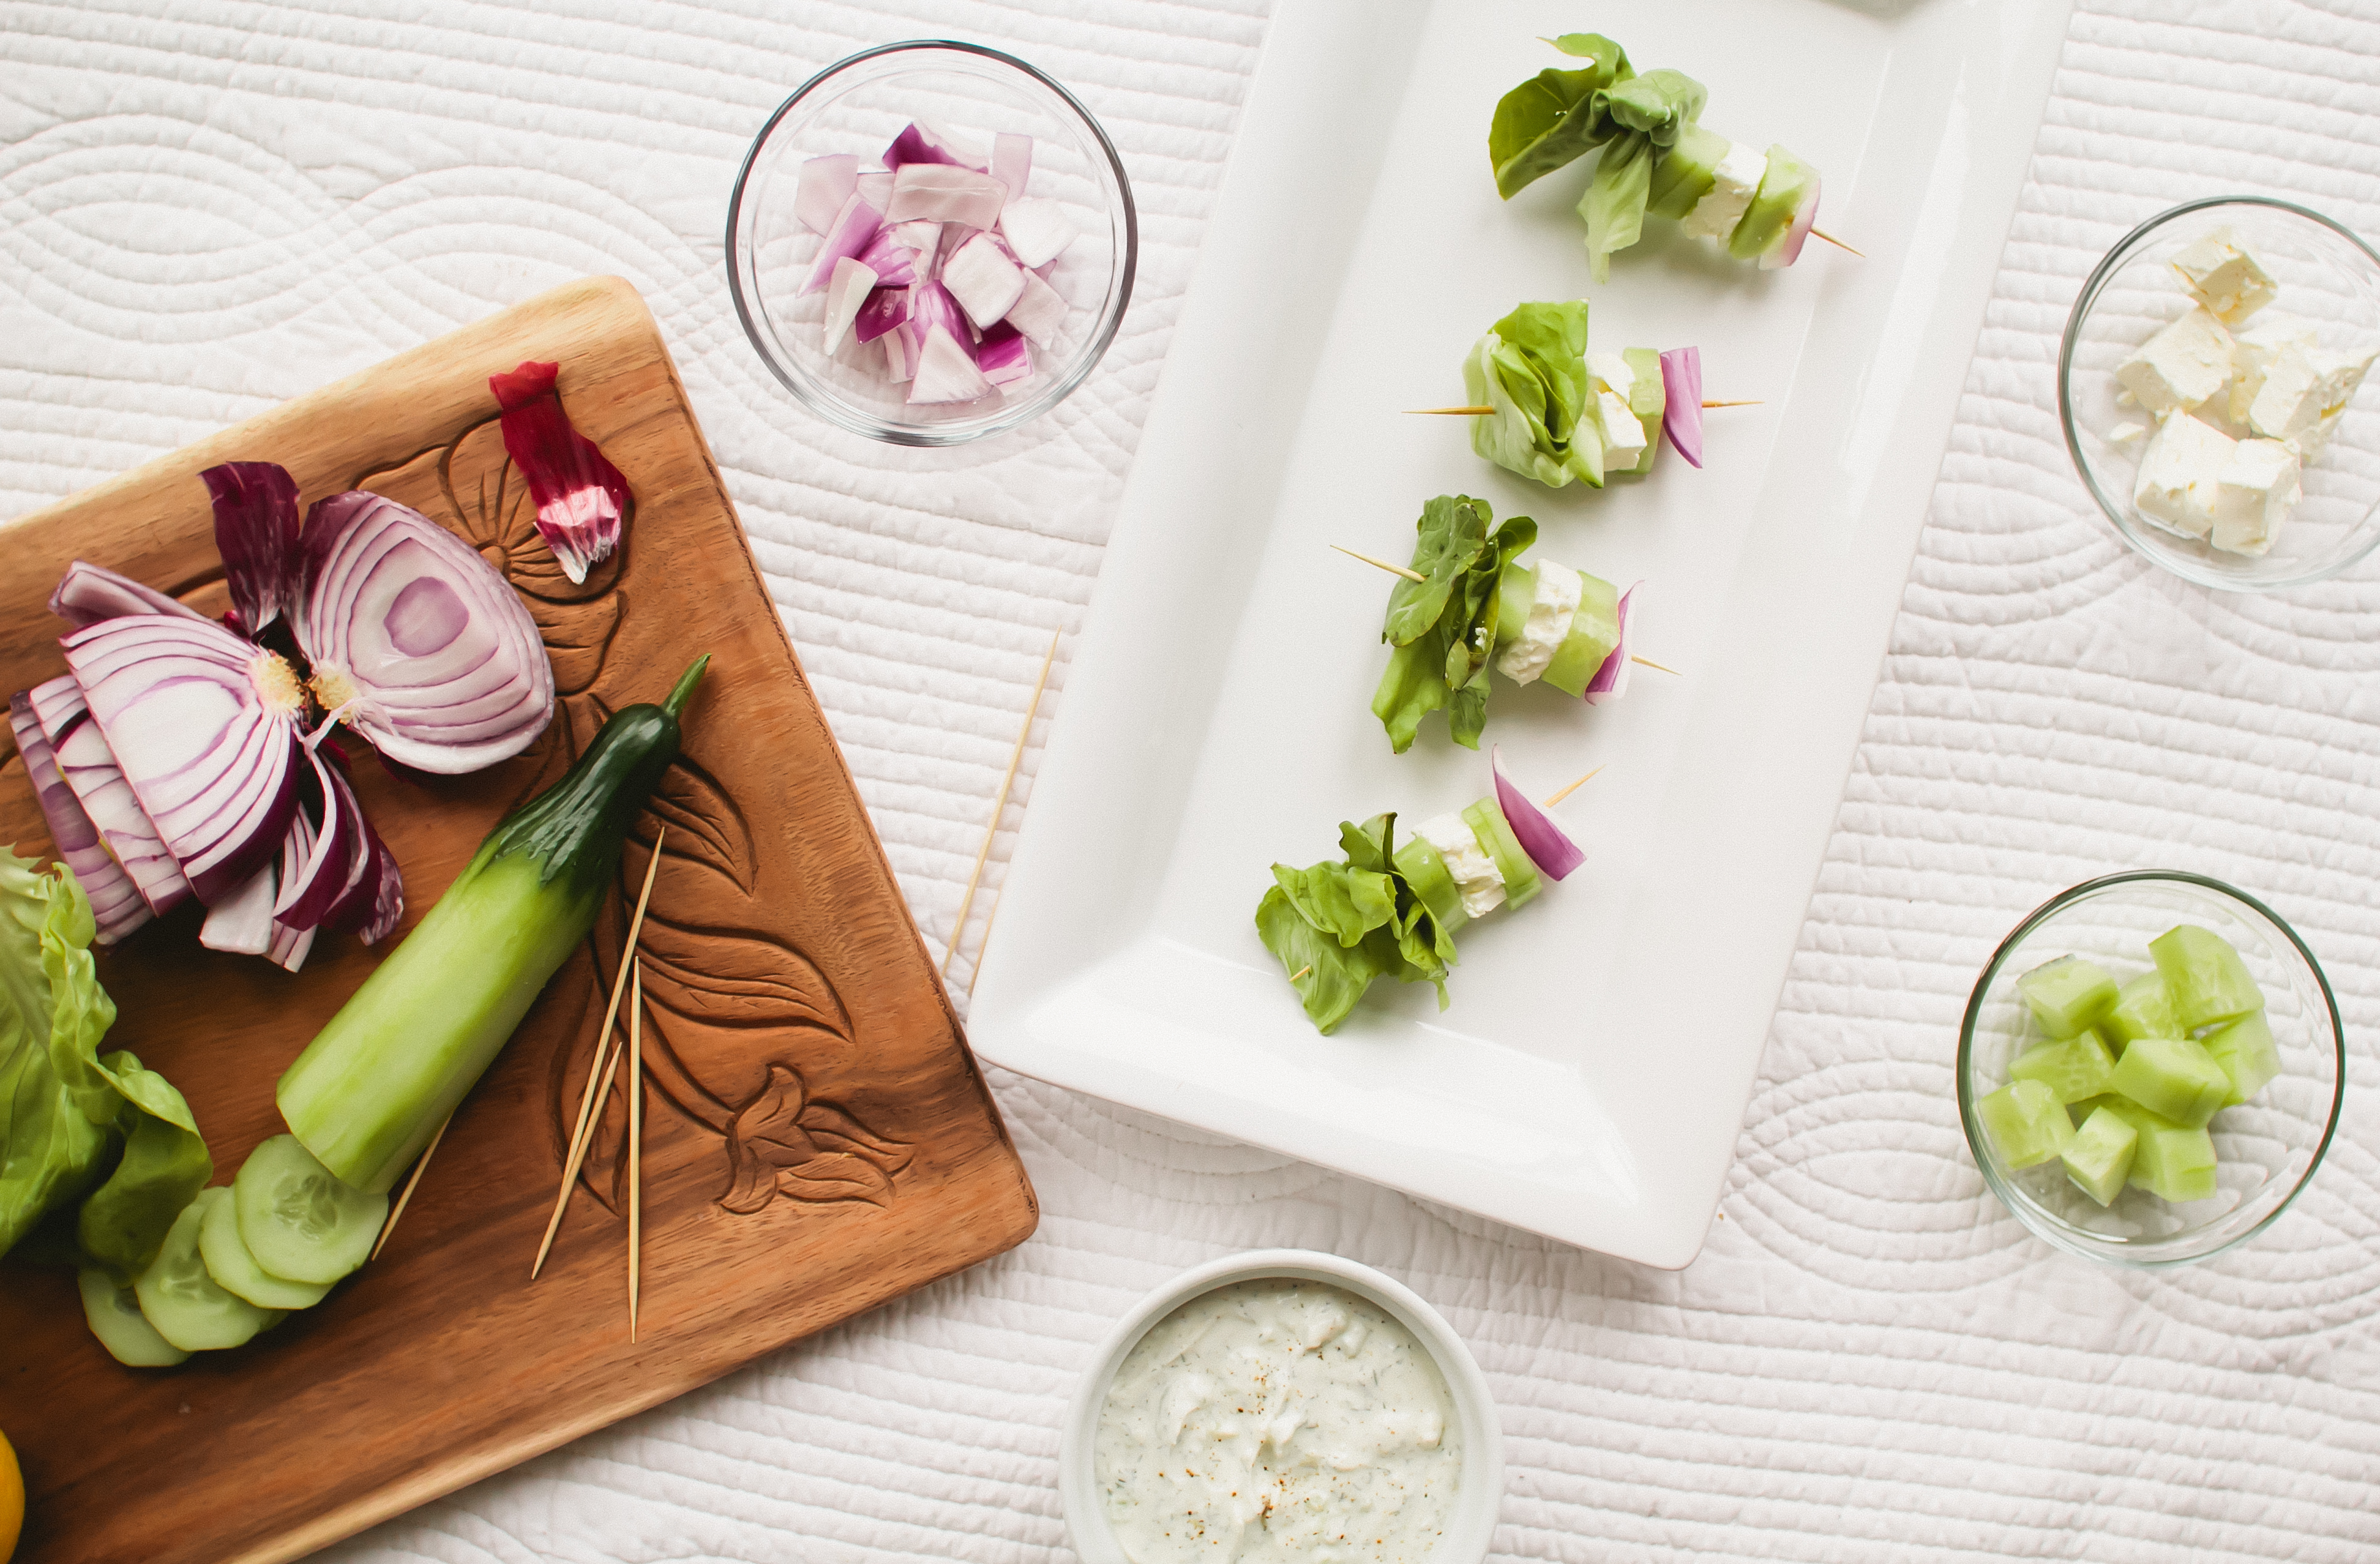
Salad art
I’m thrilled by the inherent beauty in freshly picked herbs, shimmering with dew; cracked pomegranates with glowing crimson seeds; rustic french bread, steam billowing from an airy interior; and the list goes on—I could wax poetic about edible inspirations (did I borrow that from a fruit bouquet company tagline?) for hours. And capturing this beauty in a photo is almost as satisfying as devouring the finished product. So imagine my delight when I had the opportunity to pair up with May van Millingen—an artist who takes as much pride in documenting a plate of food, in all its fleeting glory, as I do—to work on a photo/illustration collaboration. I loved the…
-
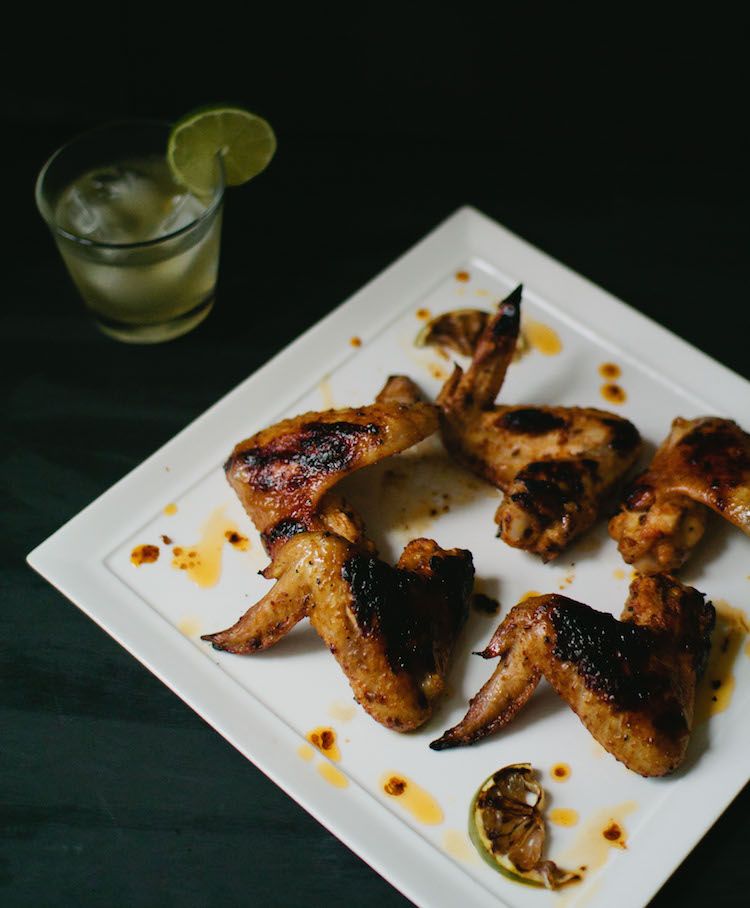
Dryglazed wings
Our sad little gas grill is extremely neglected. After a few winters left uncovered, blanketed in snow, it’s now pocked with rust, covered in a thin layer of dust and coated with remnants of burger and bratwurst from a rare summer BBQ in 2012. So when it came to testing out my Grill Master Kit and Dryglazes, courtesy of the folks at Urban Accents, I took the stovetop route—with a little help from my trusty grill pan, of course. In spite of my grilling aversion, my wings—coated heavily in the Caymen Citrus Dryglaze—were fantastic. Moral of the story: Grill or no grill, Urban Accents makes the good stuff. The Dryglazes…
-
5 steps to perfect royal icing sugar cookies
I always get suckered into those point-of-purchase-displayed royal icing sugar cookies. You know, the ones at Starbucks, decorated in the theme of the nearest popular holiday? That hard, sugary icing gets me EVERY. TIME. Upon investigation a few years back, I discovered that recreating these diabetic-coma-inducing treats seemed like way too much work, so I abstained from homemade in favor of the overpriced coffee-shop variety. But after my macaron-baking adventure, I gained some newfound patience in the baking department and decided to give it a whirl. Just like the macarons, royal icing sugar cookies are an art and a science—and almost every recipe out there completely oversimplified things, especially when…
-
Milk and cookies
I’m happy to report that after nine months of a pregnancy-induced cooking strike, everyone in Casa DiCosola is once again well fed. Our newest addition is perhaps the most nourished of us all—and he has an appetite that trumps even his mama’s. In his three short months on this earth, this little meatball has managed to more than double in weight! Knowing that every ounce, every roll, every dimple comes from my milk makes me prouder than anything in this world. Even in the sleep-deprived stupor of a 2 a.m. feeding, I’m bursting with love and joy. With every gulp, his little hand rhythmically opens and closes on my chest—and…
-
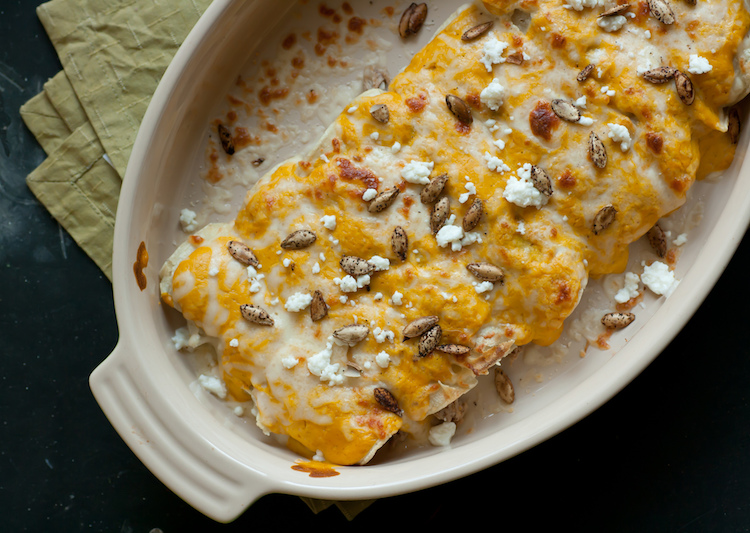
Smuggling pumpkins
It’s an impossibly beautiful, crisp and sunny Chicago fall, my uterus is now the size of a pumpkin (how festive!), and the cooking strike in Casa DiCosola continues. Dinners these days consist of cinnamon toast crunch, apples and peanut butter, fun-size snickers, english muffins and string cheese (yes, all in one night; no, not necessarily in that order). Good thing I have this little fall-themed gem of a post in my back pocket from last year. In a sea of pumpkin pies, pumpkin breads and pumpkin lattes, these pumpkin pork enchiladas are a refreshing change of pace. Pumpkin pork enchiladas You’ll need: Enchiladas One batch of carnitas (recipe here) 4 cups…